Mechanical keyboard can be a great addition to any gaming setup or office, but they are susceptible to unresponsive keys. Fortunately, there are some simple methods that can help you fix unresponsive mechanical keyboard keys. From cleaning the keyboard to replacing the keycaps and making sure your drivers and firmware are up-to-date, this guide will provide you with all the information on how to fix unresponsive mechanical keyboard keys.
Table of Contents
Description:
Learn how to quickly and easily fix unresponsive mechanical keyboard keys. Find out the most common causes and how to avoid them in the future. Mechanical keyboards are great for gaming and typing, but when one of the keys stops working, it can be frustrating.
Table of Contents
What is a Mechanical Keyboard?
Mechanical keyboard are rapidly becoming the go-to choice for gamers and typists alike. With their durable construction and tactile feedback, they offer a typing experience unlike any other. But what exactly is a mechanical keyboard? And how do you go about replacing or fixing unresponsive keys? This article will explore the answers to these questions and more.
What Causes Unresponsive Keys?
A number of factors can cause unresponsive keys:
- Ranging from dust and debris buildup to faulty key switches and worn-out cables.
- An outdated Operating System or drivers
- A dead battery
- Or even filter keys turned on May all contribute to unresponsiveness.
- Identifying the source of the issue requires careful investigation and problem-solving skills.
Symptoms of Unresponsive Mechanical Keyboard Keys
It is common for individual keys to become unresponsive or stop working altogether.
- A faulty connection to the computer
- An internal broken switch
- Dust and dirt accumulation in the key mechanism
- switch is stuck
- Broken electrical connections
How to Fix Unresponsive Keys
In cases of a malfunctioning keyboard, one must determine if the issue is hardware-related or linked to internal components in the operating system. We will provide a brief overview of both possibilities in order to get your keyboard functioning again.
Here are the steps to follow to clear the problem:
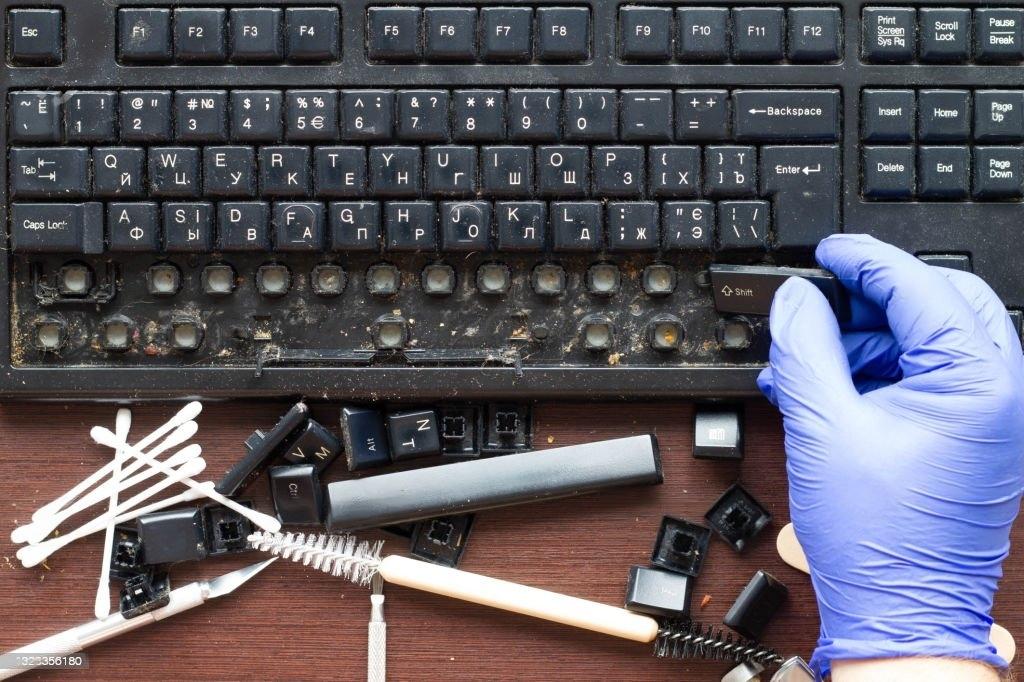
- Cleaning the Key
Keeping your laptop keys clean is essential for maintaining optimal performance. Taking the time to clean your laptop keys with the right materials can save you from potential malfunctions and ensure that all of your keys are functioning properly. The best way to start is by using a small brush or microfiber cloth to extract any debris from the keycaps. To get rid of any dried liquid, dabbing a cloth with rubbing alcohol and gently but thoroughly wiping away should do the trick.
- Troubleshooting the Keyboard
To troubleshoot a keyboard issue,
- One should begin by opening the Start Menu and going to Settings.
- Afterwards, they should enter “Recovery” into the search box and select Recovery options in the displayed results.
- Finally, in the advanced startup section, they can choose to Restart now.
- Once the computer restarts, select ‘Troubleshoot’ on the ‘Choose an option’ screen.
- After that, navigate to ‘Advanced options’ on the Troubleshoot screen.
- Lastly, access the Command Prompt from Advanced options and run a keyboard check.
- Check your keyboard drivers and settings
In order to check your keyboard drivers and settings, if you have a Windows laptop,
- Step 1: Search for “Device Manager” in the Start search box.
- Step 2: Once it appears as a result of your search, click on it. Expand the Keyboard section by clicking on its arrow at the left side.
- Step 3: Highlight your keyboard in the device list then select Uninstall Device.
- Step 4: Reboot your laptop and Windows will detect it and install its most recent driver.
Mechanical Keyboard Key Are Not Working? Here’s How to Fix It
Clean the Keyboard
Keeping your keyboard in peak performance is essential for a smooth and efficient user experience. One way to do this is by ensuring that the keycaps, which are responsible for registering keystrokes, are free from debris. Cleaning the keyboard keycaps periodically can help unresponsive keys from getting stuck on debris. If a simple blow off with canned air doesn’t work, removing the keycaps and using a soft brush or cloth to remove dirt should be does.
Change Batteries on Wireless Keyboard
Keeping your wireless mechanical keyboard up and running is essential for staying productive. Unfortunately, when its batteries start to run out, you may find that the OS doesn’t detect any key presses from the keyboard. To prevent this from happening, it’s important to change out the batteries on a regular basis. This guide will explain how to do so in a few simple steps.
Rechargeable keyboards may be susceptible to battery failure. As long as the charging cord is plugged into the keyboard it will work, but once it is disconnected, any battery power stored in the keyboard will become ineffective and the key presses will not register.
Replace the Cable
With the advancement of technology, mechanical keyboards are becoming increasingly popular. These keyboards offer a range of features, including detachable USB C cables for easy replacement. Damaged cables can cause issues with key presses not detected, and in some cases, can cause the keyboard to malfunction completely. Replacing the cable provides an easy solution to these problems, restoring full functionality to your keyboard.
Replace the worn-out cable with a new one to fixes the problem.
Replace Switch
When other solutions have exhausted, replacing a switch is often the answer. The process of disordering and soldering in a new switch is not for the faint of heart; it requires skill, patience, and the proper tools. For those who do not want to undertake such a task, hot-swappable switches are available which allow for easier replacement without soldering.
Enable On-screen Keyboard
- To enable the On-screen keyboard, you need to go to Taskbar
- Click on the Windows icon, select All Apps, and then Settings.
- From there go to Accessibility & go Keyboard.
- Under the On-screen keyboard, access keys, and Print screen section of this tab
- You can click on Enable On-screen keyboard option.
Change Keyboard Layout
Keyboard layout changes can be a challenging task, especially when dealing with hardware issues. Whether it’s due to a faulty switch or a more significant issue with the keyboard itself, resolving these issues can require more than a simple adjustment.
- Changing the language of Windows can be done in a few simple steps.
- First, locate the Windows icon, click on All Apps and then select Settings.
- In the Time & Language section, select Language & Region.
- English Language, you’ll be able to see all of the installed languages listed and by clicking on the three horizontal dots next to any language, you can change it to your preference.
Inspect the solder joints.
Soldering is an essential skill for any keyboard enthusiast. It is important to inspect the solder joints of your keyboard to ensure that all switches are correctly connected and that no solder joints have been broken. If any solder joint is broken, it is possible to resolve the connection and restore functionality. Taking the time to inspect your soldering work can save you time and energy in the long run.
Turn Off Filter Keys
Adjusting the settings of your keyboard can make typing easier and more efficient. This guide will take you through the steps to enable Filter Keys on Windows so that you can customize your keyboard experience. With this feature, you can adjust the repeat rate, delay time, and other settings to make typing more comfortable and productive.
To adjust your keyboard settings
- Start by clicking on the Windows icon located on the taskbar.
- Then, select All Apps and scroll down to locate Settings.
- After that, open Accessibility and select Keyboard.
- Finally, disable Filter Keys under Sticky, Filter & Toggle Keys.
Run Keyboard Troubleshooter
- To run the Keyboard troubleshooter on Windows, select the Windows icon on the taskbar
- Then choose ‘All Apps’ and select ‘Settings’. Afterwards, navigate to System & go
- Troubleshoot & go
- Other Troubleshooters and click on ‘Keyboard’ under ‘Other’. Lastly restart your computer.
Conclusion
Replacing unresponsive mechanical keyboard keys can be a frustrating process. Fortunately, there are methods available to fix them and ensure your keyboard continues to work properly. All of the various options for replacing mechanical keyboard keys, including the tools and supplies needed as well as step-by-step instructions on how to complete the repair.