How to Draw A Polar Bear. Polar bears are only found throughout the Arctic region. So it’s less likely we’ll ever see one up close unless you travel to the North Pole. When you learn to draw one, you’ll always have your polar bear on hand.
Also, check our Cat Coloring Pages.
To make it much easier for you, we have created a step-by-step process of drawing a polar bear in 9 simple and easy steps. Each guide has illustrations you can use as a visual guide to making the steps easier to follow. The best part? You can customize your design and even choose the colours!
Table of Contents
How to Draw A Polar Bear
Step 1
Begin by sketching the polar bear’s head at the top of the sheet. You can create the polar bear’s head by drawing an irregular circular shape over the head with two semi-circles on each side forming the ears.
To ensure the polar bear is drawn in the centre, you can create reference lines by drawing an intersecting vertical and horizontal line on the paper. You should remove the polar bear’s head at the vertical line above the horizontal line in the middle. This way, you have enough space underneath for the polar bear’s whole body.
Step 2
Draw an elongated, curved shape under the polar bear’s head to structure the arm. Ensure the power supply is slightly angled, as shown in the picture.
Remember that the arm we will draw in this step is the left arm. So it should be on the left side of the polar bear.
Step 3
Under the polar bear’s head, draw a downward-sloping line to form the right arm on the right side. Then draw a curved line that almost contains an incomplete circle that connects directly to the peninsula.
It creates the hand that completes the polar bear’s right arm. After completing this step, we should complete both opposite bear components.
Step 4
Continue by drawing a slightly curved line under the left arm to form the left side of the polar bear’s lower body. Draw A Polar Bear.
Step 5
Repeat the previous step on the opposite side to complete the lower body shape. At this moment, the lower body should be completely structured.
Now the only thing missing from the body are the legs, which we’ll edit in the next step.
Step 6
Draw a short curved line pointing opposite directions toward the centre of the polar bear’s lower body. It creates both legs of the polar bear.
To make both feet, draw another line, including a sideways oval form at the base of each leg. Remember that the polar bear’s feet should be pointing in opposite directions to draw a polar bear.
Step 7
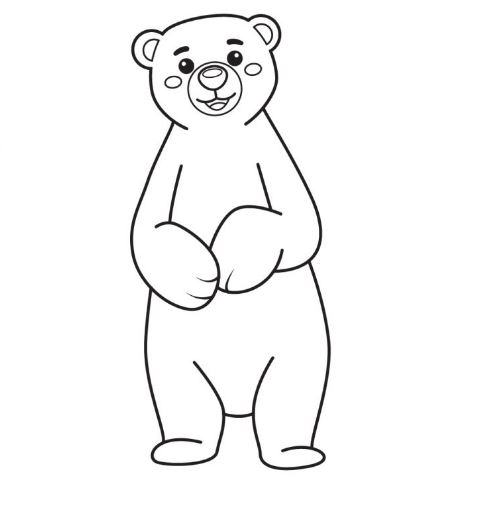
In this step, we will draw the details and patterns all over the polar bear’s body. It will help make your polar bear look realistic. Continue from top to bottom, drawing a shape in each ear, following the original outline.
It creates the inner ears. Next, draw a small circle in the polar bear’s face and highlight its snout. Finally, small curved lines on its hands create the appearance of paws.
Step 8
Continue with the polar bear’s facial features and draw an irregular circular shape for the nose. Next, draw a small oval shape on the inside of the nose.
Next, two curved lines connect under the nose. Then draw a curved line just below to shape the mouth. Don’t forget to add a curved line in the mouth to create the polar bear’s tongue!
Step 9
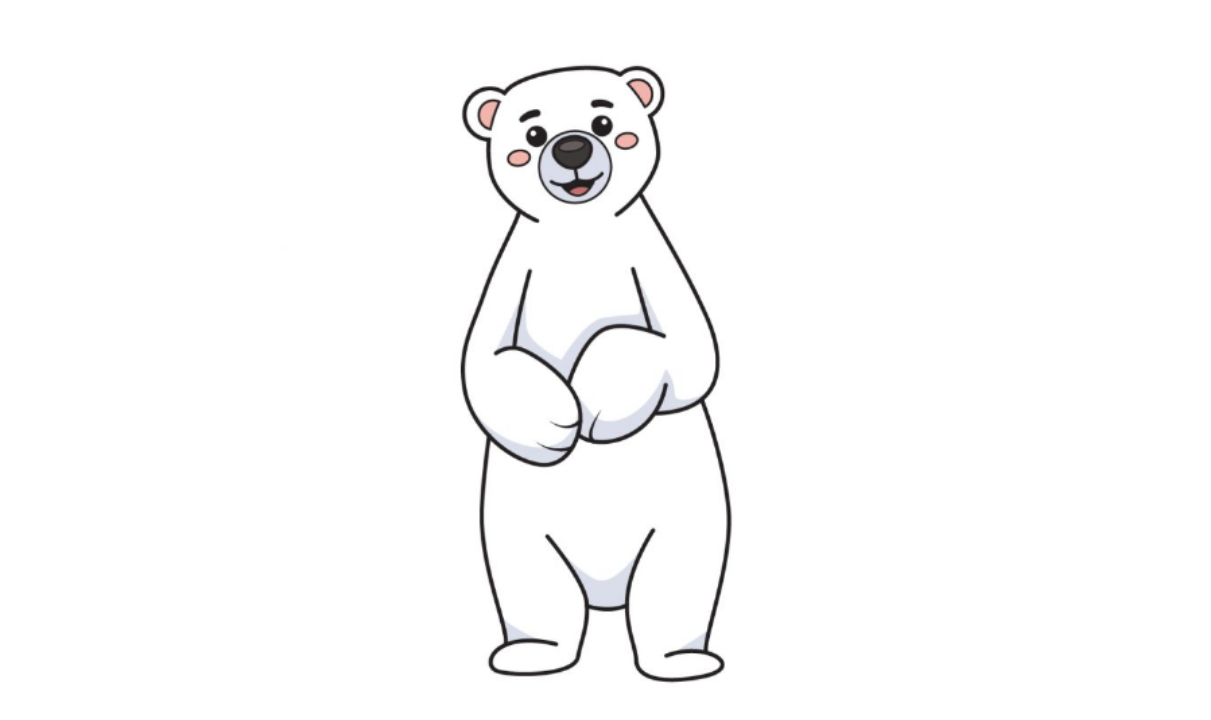
Complete the look by creating the eyes and brows. Draw two short curved lines that form arched eyebrows. Make sure your brows are thick and aligned. Next, draw a circular shape under each eyebrow to create the eyes. Now add eyeshadow, leaving out an unshaded point, to make your eyes look glowing! For extra dramatic effect, draw a side oval shape on both cheeks.
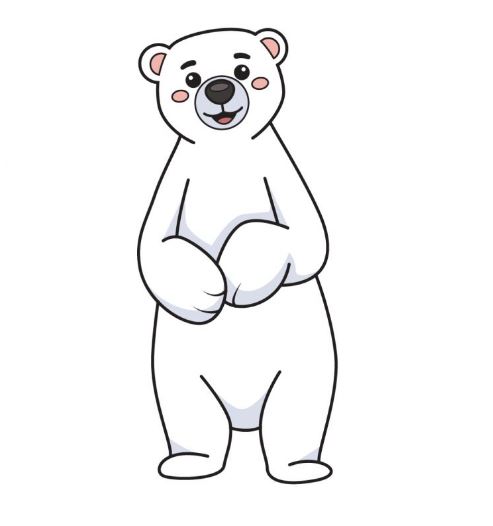
It will make your polar bear’s cheeks red; so adorable! Now that we have successfully drawn a polar bear, it’s finally time for the most exciting part: choosing the colours and colouring the polar bear.
As we all know, polar bears are predominantly white, which allows them to blend in effortlessly with their snowy surroundings. But did you know that polar bear fur has no white pigment? The polar bear’s skin is black, and its coat is transparent. You can choose to colour the polar bear in its original white colour or use a unique colour set. Either way, we’re sure the colours will turn out gorgeous!
Your Polar Bear Drawing is Finished
Also read Distinct Features of VOIP dialers and callers.