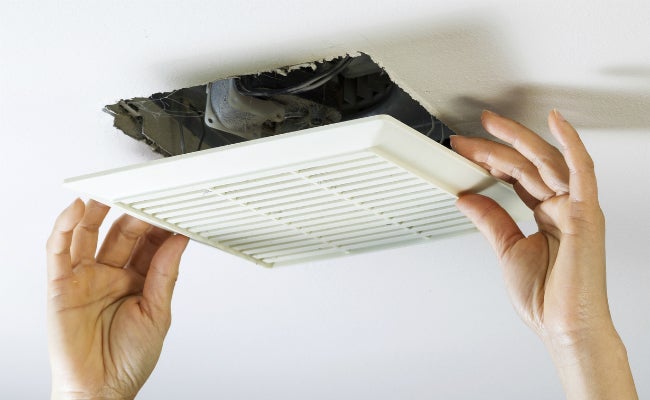
Exhaust fans that are commonly installed in the bathrooms of residential and commercial buildings force the air outside of a building through the ducts. This helps to stop moisture damage and mold growth, which cause certain damages to the walls. Even though installing a bathroom fan is not the simplest project, most labor is physically demanding and involves working above your head. In residential buildings, the duct travels through the attic of single-story homes before joining a roof jack. It is necessary to run duct from a first-floor bathroom fan to an exterior wall in homes and structures with upper floors. If your bathroom doesn’t have an existing bathroom fan and duct, bath exhaust fan installation can get difficult. Below is a complete guide on installing a bathroom fan on a first floor of a building.
Tools and Materials Needed for this Project
You’ll save time and energy if you have all the tools ready to go before you begin this DIY project.
- A screwdriver
- Cordless Drill Machine
- Saw for drywall
- Hammer
- Jigsaw
- Dust mask
- Utility knife
- Goggles, torch, and gloves
- Flexible clamps
- Duct Tape
- Caulk
- Roof covering
- Roof cement
- A vent fan
- Wire connectors
How to Install an Exhaust Fan in a First-Floor Bathroom
1. Turn off the Electricity
Disconnecting some electricity supply connections is a prerequisite before you work on any electrical components. While performing the process, you can avoid electrocution. Therefore, determining the breaker box’s location in your bathroom should be your first task. Just turn it off and make sure by properly checking again.
2. Determine the Location of the Bathroom Fan
Before the bathroom fan installation, homeowners must decide on its location. Experts suggest it should be placed in the bathroom’s center and near the highest point on the ceiling. You should also decide where the flex duct will end outside or where the exterior vent hood will be placed. Although the exhaust fan should be placed away from the windows, it must still vent to the outside.
3. Locate or Install the Power Source
If you are installing the exhaust on the ceiling, chances are that it may already have a power source running near the point. Depending on your region’s electrical regulations, you might be able to connect the fan to the same circuit as your bathroom lighting. The ceiling light in your bathroom usually receives power from the bathroom lighting circuit. You can change the circuit to power your fan. However, if the fan needs to be on a separate circuit per your code, you must install new wiring.
4. Drill a Reference Hole
When you have decided on a location for bath fan installation, use a pencil to outline. Then drill a reference hole at the center of your marking using a drill machine. Then, move to the upper story to remove any insulation surrounding the hole. This reference hole will help you determine the precise location of the fan. The vent fan should ideally be placed close to your reference hole, directly between two joists.
5. Cut the Drywall
Cutting the drywall can be challenging. Hence, you should outline your exhaust fan using cardboard. Then attach the cardboard around your reference hole and mark it for ease. Use a jigsaw to cut the material according to the template you made. Pay close attention to the lines to avoid making a too big hole. But be careful with the wires that are present in the ceiling.
6. Organize the Ductwork and Fix the Fan
If your bathroom fan installation is wall-mounted, the ductwork must only run through the wall shortly to reach the outdoor vent. Therefore, connecting the ductwork is considered simple. On the other hand, the ductwork for the ceiling vent needs to be run along the predetermined path through the ceiling and walls above. You might need to drill a second hole upstairs to achieve your routine.
7. Install the Hood to the Duct
After making a hole in the exterior wall, you must use a hose clamp to join the flexible duct to the vent hood adapter. You can use duct tape to secure the flex duct.
8. Wiring
The differences between a ceiling-mounted fan and a wall-mounted fan start to fade at this installation stage. Check again whether the breaker is off before beginning any electrical work. In most cases, identically colored fan wires are attached to your house’s electrical system. Wires from your bathroom fan are typically run to the breaker box to accomplish this. With a screwdriver, firmly fasten these wires. Before turning the electricity back on in your home, double-check that all of the wires are connected and that the electrical work is complete.
9. Testing and Finalizing the Process
You still have a few things to finish up after the bath exhaust fan installation is almost finished. You must attach your outdoor vent to your bathroom fan’s cover. Then perform any necessary cleanup following the drilling. Then test the installation, and your first-floor bathroom should have a functioning fan.
It takes some strength to install a new bathroom fan rather than simply replace one. It can be laborious to route wiring and ducting to the bathroom. The task will be significantly simplified if the building is brand new and there isn’t any drywall up yet. It will be difficult, though, if your home is old and has no bath fan. However, you can hire a professional handyman for the installation. If not, this guide can help you with the perfect installation.


