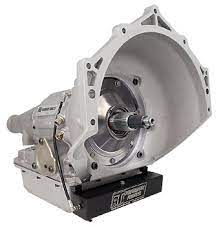
Restoring a classic car with a Powerglide transmission can be a rewarding endeavor, but it requires careful attention to detail, proper techniques, and a good understanding of the transmission’s components. Here are some tips to help you successfully restore a Powerglide transmission as part of your classic car restoration project:
- Research and Documentation:
- Acquire a detailed Powerglide transmission repair manual or restoration guide that provides step-by-step instructions, diagrams, and specifications.
- Study the original factory documentation and resources to understand the design, components, and assembly of the specific Powerglide variant used in your classic car model.
- Inspection and Assessment:
- Carefully disassemble the transmission and thoroughly inspect each component for wear, damage, or signs of corrosion.
- Create a detailed inventory of parts and components, noting any that need replacement or refurbishment.
- Cleaning and Preparation:
- Clean all parts using appropriate solvents and cleaning agents. Be cautious with fragile or intricate parts to avoid causing damage during cleaning.
- Use a parts washer, ultrasonic cleaner, or other suitable cleaning methods to ensure a thorough and residue-free cleaning. You can also lookout for turbo 400 transmission.
- Replacement Parts:
- Source high-quality replacement parts, gaskets, seals, bearings, clutches, and bands from reputable suppliers or manufacturers specializing in classic car restoration parts.
- Consider using original NOS (New Old Stock) parts if available and in good condition.
- Component Restoration:
- Refurbish or rebuild components such as the valve body, pump assembly, torque converter, and planetary sets as needed.
- Address any wear or damage in a systematic manner, following the repair manual’s guidelines.
- Precision Reassembly:
- Reassemble the transmission with meticulous attention to detail, adhering to the correct sequence and torque specifications for all bolts and fasteners.
- Lubricate seals and components appropriately to ensure smooth operation.
- Shift Kit and Modifications:
- If desired, install a shift kit or other performance modifications to enhance the transmission’s shift quality, speed, and overall performance.
- Follow the instructions provided with the shift kit or modifications closely.
- Testing and Calibration:
- Perform bench testing of the fully assembled transmission to ensure smooth and consistent shifts.
- Adjust shift linkage, controls, and other components to ensure proper functionality.
- Fluid and Filter:
- Install a new transmission filter and fill the transmission with the recommended transmission fluid to the correct level.
- Installation and Integration:
- Carefully reinstall the fully restored Powerglide transmission back into your classic car.
- Ensure all connections, linkage, wiring, and mounting points are secure and properly aligned.
- Professional Assistance:
- If you’re not experienced with transmission restoration, consider seeking assistance from a professional transmission shop or mechanic who specializes in classic car transmissions.
Remember that patience, attention to detail, and careful research are key to a successful Powerglide transmission restoration. Each step should be approached with precision and care to ensure the transmission functions reliably and contributes to the overall restoration of your classic car.


