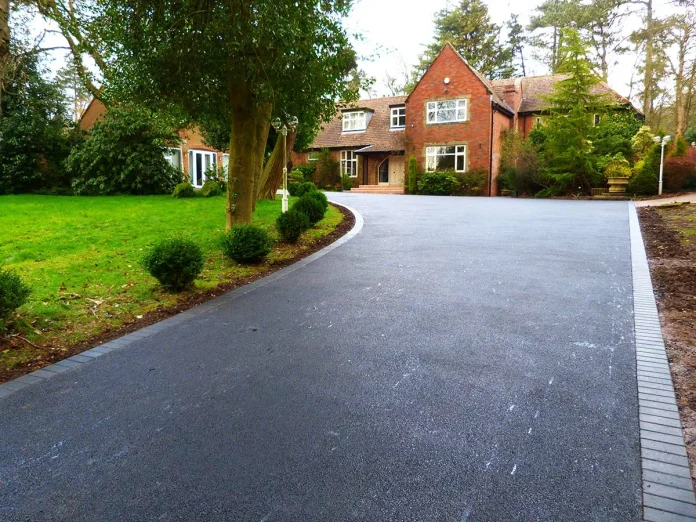
Installing a tarmac driveway is a smart investment, offering both durability and style for homeowners. However, understanding the process behind the installation helps you appreciate the work involved and ensures you know what to expect. Whether you’re planning a new driveway or upgrading an existing one, following each step carefully is essential for achieving a smooth, long-lasting surface.
If you’re considering installing tarmac driveways in Bournemouth, professional contractors can guide you through the process to ensure top-quality results. Let’s break down the complete installation process, from preparation to final touches.
1. Initial Site Assessment and Planning
Before starting the project, contractors assess the site to determine any potential issues, such as drainage problems or uneven ground. During this phase, they’ll also confirm the layout, measurements, and materials needed. Good planning ensures the installation process runs smoothly without unexpected delays.
2. Clearing and Preparing the Groundwork
The next step involves clearing the area of any debris, old surfaces, or vegetation. If the existing driveway is being replaced, contractors will remove the old material entirely. In some cases, the site may need to be excavated to the appropriate depth to provide a stable foundation. Proper groundwork is essential for preventing future issues, such as sinking or cracking.
3. Installing the Sub-Base Layer
Once the area is clear, a sub-base layer is added. This layer, often made from crushed stone or hardcore, provides structural support for the tarmac. The sub-base helps distribute the weight of vehicles evenly and ensures the surface doesn’t shift over time. Compacting the sub-base thoroughly is crucial to create a solid foundation for the next layers.
4. Laying a Binder Layer for Extra Strength
The binder layer acts as an intermediary between the sub-base and the top tarmac layer. It’s made from bitumen mixed with coarse aggregates and adds strength to the driveway, making it more resilient to heavy loads. This layer is spread evenly across the surface and compacted to ensure stability.
5. Applying the Top Tarmac Layer
Once the binder layer is in place, the top tarmac layer is applied. This is where the driveway starts to take shape. The tarmac mixture is heated to ensure it’s pliable and easy to spread. Contractors lay the tarmac evenly over the surface, ensuring every corner is covered. A roller is then used to compact the tarmac, creating a smooth, even finish.
6. Ensuring Proper Drainage
Drainage is a critical component of any driveway installation. Without it, water can accumulate on the surface, leading to cracks and potholes. Contractors ensure the driveway is slightly sloped to allow water to flow away from the surface. In some cases, drainage channels or soakaways may be installed to handle excess rainwater effectively.
7. Compacting the Surface for Durability
Compacting the tarmac is essential to achieve a dense, hard-wearing surface. Heavy rollers are used to press the layers together, eliminating air pockets and creating a strong bond between the binder and top layer. Proper compaction ensures the tarmac can handle heavy vehicles without shifting or cracking.
8. Adding Decorative Edging or Borders
For homeowners looking to enhance the appearance of their driveway, decorative edging or block paving borders can be added at this stage. These finishing touches not only improve the driveway’s aesthetics but also help contain the tarmac, preventing it from spreading over time.
9. Allowing the Tarmac to Cure
Although tarmac sets quickly, it needs time to cure before it can handle regular traffic. Contractors typically recommend waiting at least 24 to 48 hours before parking vehicles on the driveway. This curing period allows the tarmac to harden fully, ensuring a durable, long-lasting surface.
10. Final Inspection and Clean-Up
After the installation is complete, contractors conduct a final inspection to ensure everything meets the required standards. They’ll check for any imperfections or areas that need additional compaction. Once satisfied, they’ll clean up the site, leaving you with a pristine, ready-to-use driveway.
11. Maintaining Your New Tarmac Driveway
To keep your new tarmac driveway looking its best, occasional maintenance is necessary. Regular cleaning, sealing small cracks, and addressing any drainage issues will extend the life of the surface. With proper care, a tarmac driveway can last for 20 years or more, providing excellent value for money.
12. Common Issues and How to Prevent Them
While tarmac is durable, certain issues can arise if the installation isn’t done correctly. Common problems include cracking, sinking, and water pooling. Choosing an experienced contractor and following proper installation techniques can prevent these issues and ensure a high-quality finish.
Conclusion
Understanding the installation process for tarmac driveways ensures you’re well-prepared for what’s involved. From site preparation to the final compaction, each step plays a vital role in creating a durable and attractive surface. With the help of professional contractors, you can enjoy a smooth driveway that adds value to your home and stands the test of time.
If you’re ready to upgrade your outdoor space with a sleek and durable surface, reach out to a trusted installer today. With a well-installed tarmac driveway, you’ll enjoy a functional and beautiful addition to your property for years to come.


